Introduction
Recently, I’ve been working on a project that utilizes Rust for image-related processing. Naturally, I needed a frontend UI to manage the workflow and display relevant images, and ideally, it should support cross-platform functionality. Since my experience with Rust is limited, especially in terms of Rust UI development, I began searching for accessible frameworks. That’s when I discovered Tauri, which seemed promising, especially since it supports SvelteKit for the frontend – the only web framework I’m somewhat familiar with. I also considered using Slint, as it shares similarities with Qt, but I plan to explore that later. Tauri allows the use of web technologies for the frontend and Rust for the backend. Tauri is already quite well-known, so I won’t go into too much detail about it. As I’m not a professional frontend developer and not particularly proficient in Rust, this post primarily documents how to start from scratch with Tauri to develop an image-centric desktop application, using Rust for some image processing tasks and SvelteKit for the UI interface.
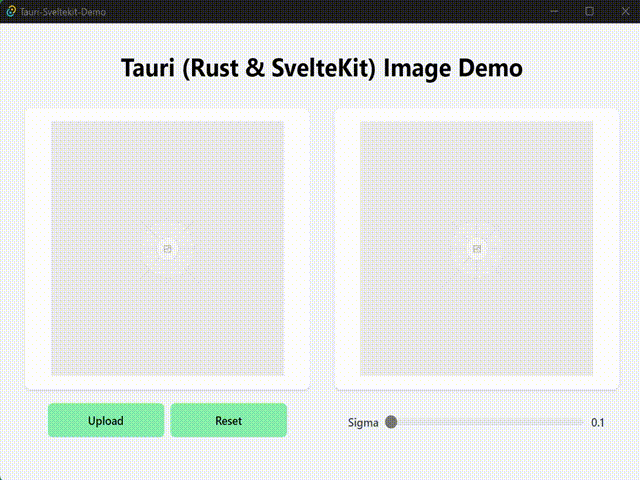
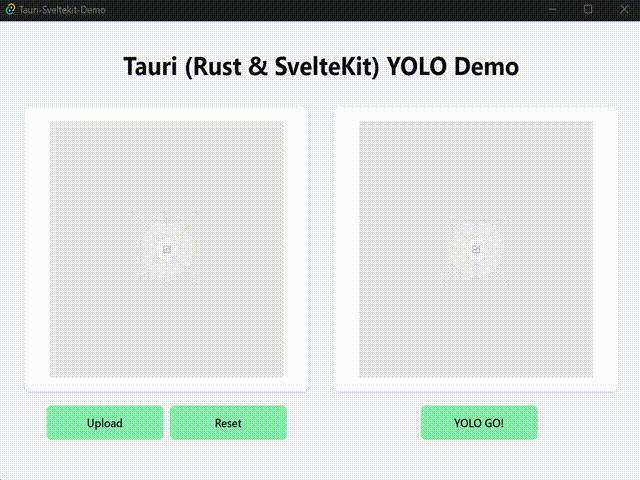
Before diving into the details, let me first give you a glimpse of this simple Tauri App. The functionality of this app is quite straightforward: it allows users to upload an image and then apply a blur effect to it. Users can adjust the sigma value in real-time to control the level of blurring, and the blurred image is displayed on the UI (If you are interested in image processing in webpage using Rust and WebAssembly, you can refer to this post). Additionally, there’s another version of the app that utilizes the YOLOv8 model for object detection. Users can upload an image, and the model will perform object detection on it, with the results being displayed on the UI. The UI of these two apps are similar, but they differ in the backend logic. Below are simple demos of these two apps:
Setting Up Tauri Project
Webveiw is required for Tauri to run, Tauri uses the operating system’s default webview. They are WebView2(come with Edge, Chrome…) on Windows, WebKit (Safari’s engine) on macOS, and WebKitGTK on Linux. Normally, they are already installed on the system.
Detailed steps can be found in the official start guide. Here, I’ll briefly summarize the steps to set up a Tauri project, more for my future reference.
Create the SvelteKit Frontend
Make sure your system have installed Node.js and npm.
$ mkdir tauri-sveletkit-demo
$ cd tauri-sveletkit-demo
$ npm create svelte@latest
# App template: `Skeleton project ` is good.

$ npm install --save-dev @sveltejs/adapter-static
Then update the adapter import in the svelte.config.js file:
// svelte.config.js
import adapter from '@sveltejs/adapter-static' // This was changed from adapter-auto
Lastly, disable SSR and enable prerendering by adding a +layout.js file under src/routes/ with the following content:
// src/routes/+layout.js
export const prerender = true
export const ssr = false
Follow the official guide to install tailwindcss for styling (optional).
Create the Rust Backend
Make sure you have Rust (cargo , rustc , rustup) installed. If not, refer to the official guide.
# Tauri-v1 is used.
$ cargo install tauri-cli
# go to the root of the SvelteKit project
$ cd tauri-sveletkit-demo
$ cargo tauri init
# web assets relative path: `../build`
# URL of dev server: `http://localhost:5173`
# frontend dev command: `npm run dev`
# frontend build command: `npm run build`

# after init, you will see a `src-tauri` directory created.

# install the Tauri API
$ npm install @tauri-apps/api
Run the Tauri App
Run the app in development mode:
$ cargo tauri dev
# once the app is opened, press `F12` to open the developer tools for frontend debugging.
Before building the app, we need to modify the bundle identifier of src-tauri/tauri.conf.json file.
// src-tauri/tauri.conf.json
{
    ......
    "tauri": {
        ......
        "bundle": {
            ......
            "identifier": "com.example.tauri-sveltekit-demo"
            ......
        }
        ......
    }
}
Then build the app:
$ cargo tauri build
# The built app is located in the `src-tauri/target/release/` directory.
Image Blur App
For how to call Rust functions from frontend, please refer to the official documentation, nothing complicated here. You can get the full code of blur app here.
UI Styling
I am not a frontend developer, just can do some basic styling. I use tailwindcss for styling, and the following is the code for the image blur app, the original image and the processed image are displayed side by side, and the sigma value can be adjusted to control the level of blurring, and the image can be uploaded and reset.
// src/routes/+page.svelte
<div class="min-h-screen bg-gray-100 p-8">
  <div class="max-w-7xl mx-auto">
      <h1 class="text-3xl font-bold text-center mb-8">Tauri (Rust & SvelteKit) Image Demo</h1>
      <div class="grid grid-cols-1 md:grid-cols-2 gap-8">
          <div class="flex flex-col justify-between">
              <div class="bg-white p-4 shadow rounded-lg flex justify-center items-center">
                  <img
                    src={imageUrl}
                    alt="Original image"
                    class="max-w-full h-auto"
                    style="width: 300px; height: 300px; object-fit: cover;"
                    aria-hidden="true"
                  />
              </div>
              <div class="mt-4 flex justify-center">
                  <div class="flex justify-center">
                      <button on:click={openImage} class="bg-green-300 items-center justify-center rounded-md text-sm font-medium hover:bg-green-500 h-10 px-4 py-2 flex-none" style="width: 150px;">
                        Upload
                      </button>
                      <button on:click={resetImage} class="ml-2 bg-green-300 items-center justify-center rounded-md text-sm font-medium hover:bg-green-500 h-10 px-4 py-2 flex-none" style="width: 150px;">
                        Reset
                      </button>
                  </div>
              </div>
          </div>
          <div class="flex flex-col justify-between">
              <div class="bg-white p-4 shadow rounded-lg flex justify-center items-center">
                  <img
                    src={resImageUrl}
                    alt="Processed image"
                    class="max-w-full h-auto"
                    style="width: 300px; height: 300px; object-fit: cover;"
                    aria-hidden="true"
                  />
              </div>
              <div class="mb-2 flex justify-center">
                  <div class="flex items-center space-x-2">

                      <label for="image-slider" class="text-sm font-medium text-gray-700">
                          Sigma
                      </label>
                      <input
                          on:input={(e) => processImage(e.target.value)}
                          id="image-slider"
                          min="0.1"
                          max="10"
                          step="0.1"
                          class="w-64 h-2 bg-gray-200 rounded-lg appearance-none cursor-pointer"
                          type="range"
                          value="0.1"
                      />
                      <label for="image-slider" class="text-sm font-medium text-gray-700" style="width: 20px; display: inline-block; text-align: center;">
                        {sigmaValue}
                    </label>
                  </div>
              </div>
          </div>
      </div>
  </div>
</div>
Upload Image Functionality
There are two ways to upload images by file dialog in Tauri, one is to upload the image in Rust backend and then send the image data to the frontend, the other is to upload the image in the js frontend and then send the image data to the backend. Here, I choose the first way. The following is the code for the image upload functionality in the frontend:
// src/routes/+page.svelte
<script>
    import { invoke } from '@tauri-apps/api/tauri'

    let imageUrl = '/placeholder.svg'; // default image placeholder
    let resImageUrl = '/placeholder.svg'; // default image placeholder

    async function openImage() {
        try {
            // call the Rust function `open_image` to open the file dialog
            const result = await invoke('open_image');
            // `result` is the data returned from Rust
            if (result) {
                const { encoded, format } = result;
                // `encoded` is the base64 encoded image data
                // `format` is the image format, e.g., `png`, `jpeg`
                console.log("Image opened, format:", format);
                imageUrl = `data:image/${format};base64,${encoded}`;
                resImageUrl = '/placeholder.svg'; // reset processed image
            }
        } catch (error) {
            console.error('Image open error or cancel:', error);
        }
    }

    function resetImage() {
        imageUrl = '/placeholder.svg';
        resImageUrl = '/placeholder.svg';
        console.log("Reset image.");
    }
</script>
Before implementing the Rust functions, add the following dependencies to the Cargo.toml file:
// src-tauri/Cargo.toml
[dependencies]
rfd = "0.10"
base64="0.13"
image = "0.24"
rfd crate is used to open the file dialog, base64 crate is used to encode the image data, and image crate is used to process the image data.
The following is the code for the image upload functionality in the Rust backend:
// src-tauri/src/main.rs
#![cfg_attr(not(debug_assertions), windows_subsystem = "windows")] // hide the console window on Windows
use base64::{encode_config, STANDARD};
use std::fs::File;
use std::io::{Read, Cursor};
use rfd::FileDialog;
use serde::Serialize;
use tauri::State;
use std::sync::{Arc, Mutex};
use image::{ImageOutputFormat, io::Reader as ImageReader, imageops::FilterType};

// this is the data that will be sent to the frontend
// the data must be serializable
#[derive(Serialize)]
struct ImageData {
    encoded: String,
    format: String,
}

// AppState is used to store data that need to keep across multiple Tauri API calls
// it will be keeped in the memory
struct AppState {
  image_data: Arc<Mutex<Option<Vec<u8>>>>,
}

fn main() {
  let app_state = AppState {
    image_data: Arc::new(Mutex::new(None)),
  };
  // standard Tauri app initialization
  tauri::Builder::default()
    .manage(app_state)
    .invoke_handler(tauri::generate_handler![open_image, process_image]) // register the Rust functions
    .run(tauri::generate_context!())
    .expect("Error while running Tauri application.");
}

#[tauri::command] // register the Rust function to be called from the frontend
fn open_image(app_state: State<AppState>) -> Result<ImageData, String> {
  // open the file dialog
  let file = FileDialog::new()
  .add_filter("image", &["jpg", "jpeg", "png"])
  .set_directory("/")
  .pick_file();

  if let Some(path) = file {
    let extension = path.extension()
        .and_then(|ext| ext.to_str())
        .unwrap_or_default()
        .to_lowercase();

    let format = match extension.as_str() {
        "jpg" | "jpeg" => "jpeg",
        "png" => "png",
        _ => return Err("Unsupported format image opened.".to_string())
    };

    let mut file = File::open(&path).map_err(|e| e.to_string())?;
    let mut buffer = Vec::new();
    file.read_to_end(&mut buffer).map_err(|e| e.to_string())?;

    // store the raw image data to the app state
    let mut image_data = app_state.image_data.lock().unwrap();
    *image_data = Some(buffer.clone());

    // return the image data as base64 for the frontend showing
    let base64_string = encode_config(buffer, STANDARD);
    Ok(ImageData { encoded: base64_string, format: format.to_string() })
  } else {
    Err("User cancel to upload image.".to_string())
  }
}
Now, a basic image upload functionality is implemented. You can upload an image and display it on the UI after cargo tauri dev. Here are some key points to note:
-
If there are mutiple values need to be returned from the Rust function to the frontend, you can use a struct to wrap them, and the struct must be serializable.
-
The
AppStateis used to store data that need to keep across multiple Tauri function calls, and it will be kept in the memory for fast read and write. TheArcandMutexare used to ensure the thread safety. -
Crate version is important, especially for the
rfdandbase64crates, as the latest version does not compitable with the above code.
Image Processing Functionality
Basic blur effect is applied to the uploaded image, and the processed image is displayed on the UI. The following is the code for the image processing functionality in the frontend:
// src/routes/+page.svelte
<script>
    let sigmaValue = 0.1;

    async function processImage(sigma) {
        sigmaValue = sigma;
        try {
            const result = await invoke('process_image', { sigma: sigma });
            if (result) {
                const { encoded, format } = result;
                console.log("Image processed with sigma:", sigma);
                // processed image is displayed on the right side of the UI
                resImageUrl = `data:image/${format};base64,${encoded}`;
            }
        } catch (error) {
            console.error('Image processed error or cancel:', error);
            resImageUrl = '/placeholder.svg';
        }
    }
</script>
The following is the code for the image processing functionality in the Rust backend:
// src-tauri/src/main.rs
#[tauri::command]
fn process_image(app_state: State<AppState>, sigma: String) -> Result<ImageData, String> {
  println!("sigma: {}", sigma);
  // convert sigma string to f32
  let sigma = sigma.parse::<f32>().map_err(|e| e.to_string())?;
  // get the original image data from the app state
  let image_data = {
      let image_data = app_state.image_data.lock().unwrap();
      image_data.clone().ok_or("No image loaded")?
  };

  // load image data as image::DynamicImage
  let image = ImageReader::new(Cursor::new(&image_data))
      .with_guessed_format()
      .map_err(|e| e.to_string())?
      .decode()
      .map_err(|e| e.to_string())?;

  // Resize the image if necessary
  let resized_image = if image.width() > 300 || image.height() > 300 {
    image.resize(300, 300, FilterType::Lanczos3)
  } else {
    image
  };

  // Apply blur to the resized image, the blur function is from the `image` crate
  let blurred_image = resized_image.blur(sigma);

  // convert the blurred image to Vec<u8>, and write to buffer as jpeg
  let mut buffer = Cursor::new(Vec::new());
  blurred_image.write_to(&mut buffer, ImageOutputFormat::Jpeg(80))
      .map_err(|e| e.to_string())?;

  // return the base64 encoded image data for the frontend showing
  let base64_string = encode_config(buffer.into_inner(), STANDARD);
  Ok(ImageData { encoded: base64_string, format: "jpeg".to_string() })
}
Now, all the functionalities for the image blur app are implemented. This is a very simple app, and it should be a good starting point for Tauri image-related app development.
Tauri YOLO Detect App
Once the image blur app is implemented, the YOLO detect app is quite straightforward. The only difference is the backend logic. The Tauri YOLO detect app uses the YOLOv8 model for object detection, it uses opencv rust to load the ONNX model and perform object detection, you can check this post for details implementation, the code is adapted to the Tauri app.
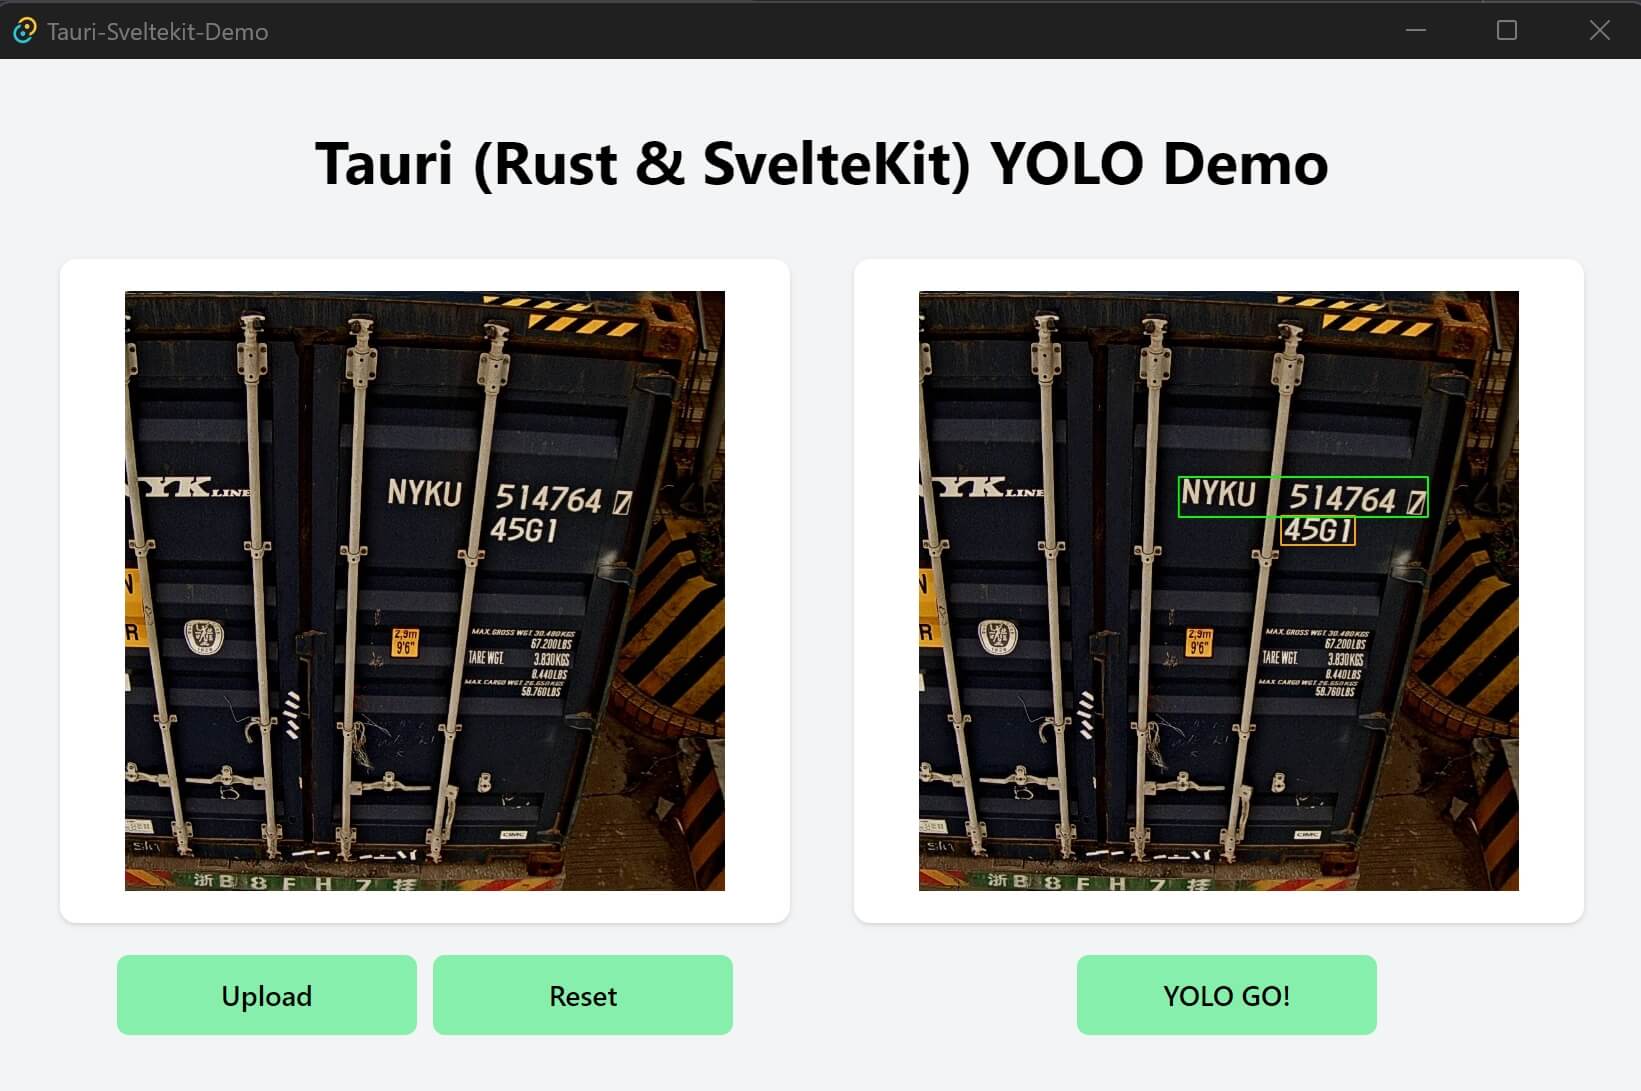
The YOLO model detects the shipping container number and type-size from the container image. The following image shows an example, full animation is shown in the introduction section.
The UI styling here is very similar to the above image blur app with minor changes, I won’t repeat it here. You can get the full code of Tauri YOLO detect app here.
The following is the frontend code for the YOLO detect app, very similar to the image blur app:
<script>
    import { onMount } from 'svelte';
    import { invoke } from '@tauri-apps/api/tauri'

    let imageUrl = '/placeholder.svg';
    let resImageUrl = '/placeholder.svg';

    // init the YOLOv8 ONNX model once the app is started
    onMount(() => {
        initYoloONNX();
    });

    async function initYoloONNX() {
        try {
            const result = await invoke('init_yolo_onnx');
            if (result == 'OK') {
                console.log("Yolov8 ONNX initialized.");
            } else {
                console.error("Yolov8 ONNX init failed.");
            }
        } catch (error) {
            console.error('Yolo8 ONNX init error:', error);
        }
    }

    async function runYoloDetect() {
        try {
            const result = await invoke('run_yolo_detect');
            if (result) {
                const { encoded, format } = result;
                console.log("Yolov8 detect done.");
                resImageUrl = `data:image/${format};base64,${encoded}`;
            }
        } catch (error) {
            console.error('Yolo8 detect error:', error);
            resImageUrl = '/placeholder.svg';
        }
    }

    async function openImage() {
        ......
    }

    function resetImage() {
        ......
    }
</script>
Now we start to implement the Rust backend for the YOLO detect app. Because we use the opencv rust to load the ONNX model and perform object detection, we need to add the following dependencies to the Cargo.toml file:
// src-tauri/Cargo.toml
[dependencies]
rfd = "0.10"
base64="0.13"
opencv = "0.80"
Craete a yolo.rs file under the src-tauri/src directory, you can get the yolo.rs file here, detail explanation can be found in this post.
The following is the Rust code for main.rs file:
// src-tauri/src/main.rs
#![cfg_attr(not(debug_assertions), windows_subsystem = "windows")]
use base64::{encode_config, STANDARD};
use std::fs::File;
use std::io::{Read, Cursor};
use rfd::FileDialog;
use serde::Serialize;
use tauri::State;
use std::sync::{Arc, Mutex};
mod yolo; // import the yolo module, the `yolo.rs` file
#[derive(Serialize)]
struct ImageData {
encoded: String,
format: String,
}
struct AppState {
image_data: Arc<Mutex<Option<Vec<u8>>>>,
// yolo onnx model is also stored in the app state memory
yolo_model: Arc<Mutex<Option<yolo::Model>>>
}
fn main() {
let app_state = AppState {
image_data: Arc::new(Mutex::new(None)),
yolo_model: Arc::new(Mutex::new(None))
};
tauri::Builder::default()
.manage(app_state)
.invoke_handler(tauri::generate_handler![open_image, init_yolo_onnx, run_yolo_detect])
.run(tauri::generate_context!())
.expect("Error while running Tauri application.");
}
#[tauri::command]
fn init_yolo_onnx(app_state: State<AppState>) -> Result<String, String> {
let model = match yolo::load_model() {
Ok(model) => model,
Err(e) => {
return Err(format!("Failed to load Yolo ONNX model: {}", e));
}
};
// store the model to the app state
let mut yolo_model = app_state.yolo_model.lock().unwrap();
*yolo_model = Some(model);
Ok("OK".to_string())
}
#[tauri::command]
fn run_yolo_detect(app_state: State<AppState>) -> Result<ImageData, String> {
// get the yolo onnx model from the app state
let mut model_guard = app_state.yolo_model.lock().unwrap();
let mut model = model_guard.as_mut().expect("Failed to get Yolo ONNX model from app state.");
// get the original image data from the app state
let image_data = {
let image_data = app_state.image_data.lock().unwrap();
image_data.clone().ok_or("Failed to get image from app state")?
};
// convert the image data to opencv Mat
let img_vec:opencv::core::Vector<u8> = opencv::core::Vector::from_iter(image_data);
let mat = opencv::imgcodecs::imdecode(&img_vec, opencv::imgcodecs::IMREAD_UNCHANGED);
let mut mat = mat.unwrap();
// perform object detection
let detections = yolo::detect(&mut model, &mat, 0.5, 0.5);
if detections.is_err() {
return Err(format!("Failed to detect: {}", detections.err().unwrap()));
}
let detections = detections.unwrap();
println!("{:?}", detections);
yolo::draw_predictions(&mut mat, &detections, &model.model_config);
let params: opencv::core::Vector<i32> = opencv::core::Vector::default();
// convert the mat to base64 encoded image data
let mut encoded = opencv::types::VectorOfu8::new();
opencv::imgcodecs::imencode(".jpg", &mat, &mut encoded, ¶ms).unwrap();
let base64_string = encode_config(&encoded.to_vec(), STANDARD);
Ok(ImageData { encoded: base64_string, format: "jpeg".to_string() })
}
#[tauri::command]
fn open_image(app_state: State<AppState>) -> Result<ImageData, String> {
......
}
Now you can run the Tauri YOLO detect app with cargo tauri dev and test it.
Observations and Thoughts
-
Tauri is quite easy to use, especially for frontend web developers (even I am not a web developer), but you need to know a little about Rust. Community support is also good, and the documentation is quite comprehensive.
-
The executable file size is small. The above image blur app (
.exe) is 5MB in Windows. -
The Tauri roadmap shows that the Tauri team is working on the iOS and Android support in Tauri v2. The one codebase for all platforms is quite attractive.
-
The difficulty of Rust is much higher than the frontend. But you still can make a good Tauri App with little Rust code, unless we need to do some heavy lifting in the backend. There are many system-level api in Tauri, we can use them to do many things, such as file system, process, window, etc.
-
I feel that the responsiveness and speed of the UI (fast image canvas update, etc.) is not as good as a native app, such as a Qt app, so I guess Slint might provide better native performance. But Tauri is still good for most of the use cases.