Why I made this
Recently, my house doorbell broke, and I was secretly pleased. I’ve never liked the traditional ‘ding-dong’ sound (or other sounds) that doorbells make. It’s similar to how I always keep my phone on silent; I don’t like auditory notifications. The broken doorbell gave me the perfect motivation to DIY a SCILENT DOORBELL! Last month, Raspberry Pi released the $6 Pico W microcontroller with Wi-Fi capability, which I haven’t had the chance to experiment with yet. This seemed like the perfect opportunity to use it for my smart silent doorbell.
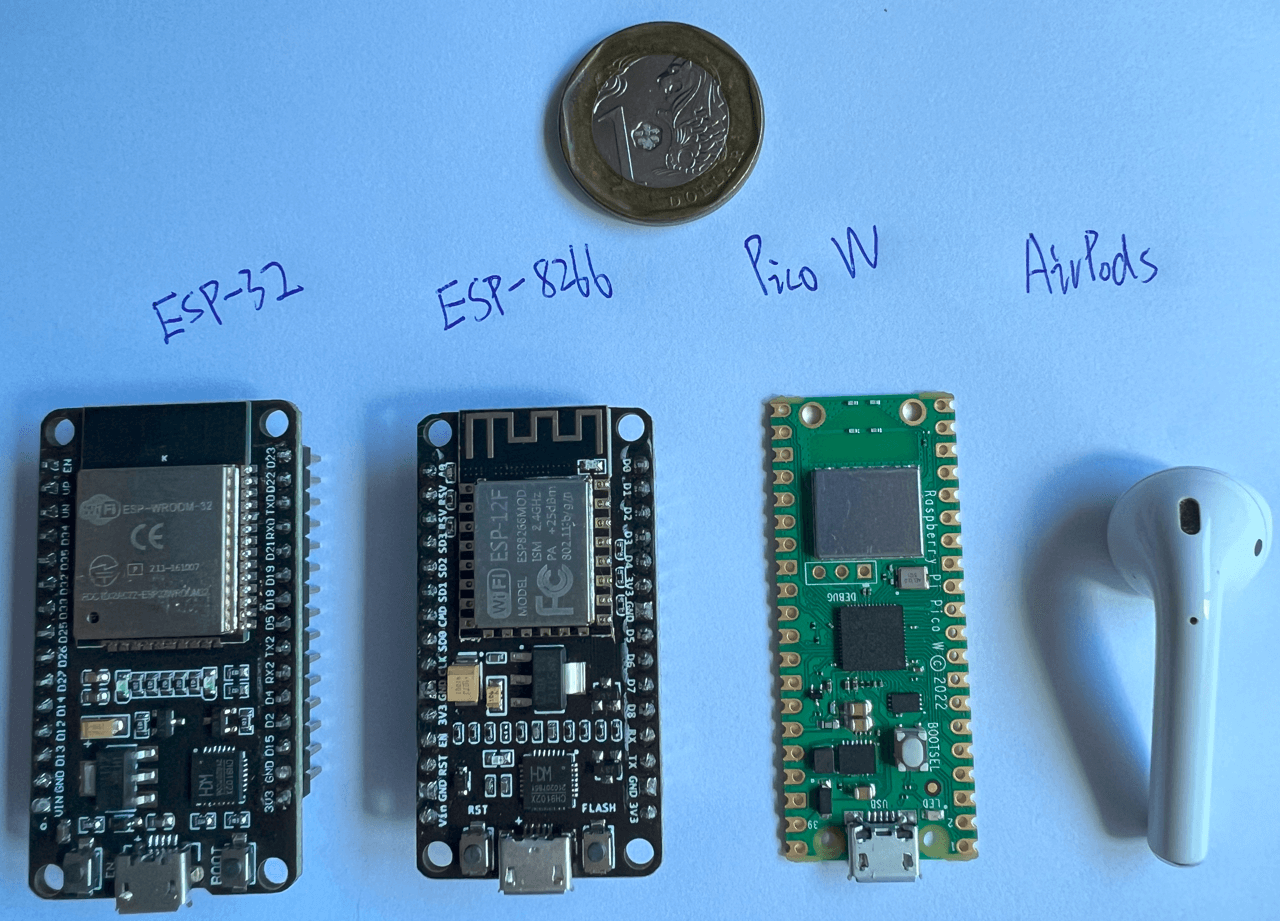
Here is a photo comparison of my ESP-32, ESP-8266, Pico W boards, AirPods and Singapore $1 coin. Pico W is really small!
Components Required
-
Raspberry Pi Pico W: $6 USD
-
4-pin Push Button Switch: $0.18 SGD
-
8R 1W Speaker: $0.89 SGD
-
Micro USB Cable: for power supply, can work with power bank or wall usb charger
-
Jumper Wire x 4
-
Smartphone with Telegram installed: used to receive notifications from the doorbell and to send replies to the doorbell
-
Smart watch connected to smartphone (optional): used to receive notifications
Circuit Diagram

Connect the push button switch to GP15 and GND on the Pico W. Connect the speaker positive terminal to GP16 and the negative terminal to GND. The Pico W can be powered by a USB power bank or a wall USB charger.
How it works

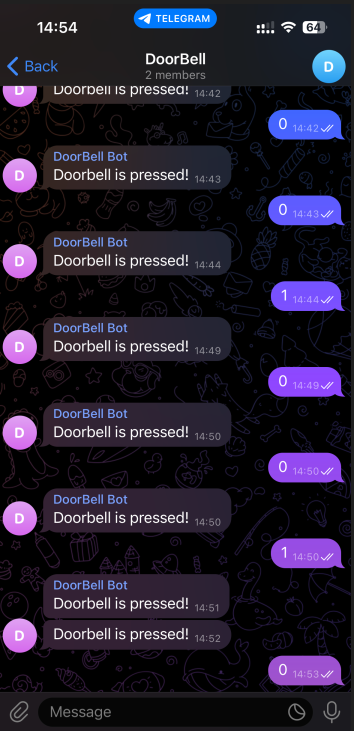
The Pico W is programmed to send a notification/message (http post request) to a Telegram bot when the push button is pressed. The bot will then foward the notification to the telegram group, so we will receive the notification on the smartphone or smart watch. The user can then reply (0 or 1) in the group chat to trigger the Pico W to play different sound on the speaker to tell the visitor to wait or leave. Telegram webhook is used to receive the reply from the user. A webserver is set up on the Pico W to receive the webhook and trigger the speaker to play the sound.
Set up Telegram(TG)
Before we start coding, we need to set up a Telegram bot and a Telegram group. The bot will be used to send and receive messages from the Pico W. The group will be used to receive notifications from the Pico W and to send replies to the Pico W.
First, we need to create a Telegram bot. Open Telegram and search for @BotFather. Send /newbot to @BotFather to create a new bot. Follow the instructions to set a name and username for the bot. After the bot is created, @BotFather will send you a token for the bot (the token is something like “845564132466:AAGVGETGO0oBRT7X5jxJZNpoeCv-YcrM940”). Save the Bot token somewhere, we will need it later.
Next, create a new Telegram group, add the bot we created above to the group and make the bot an admin of the group (this step should be easy). Then open your browser and go to https://api.telegram.org/bot<your_bot_token>/getUpdates (replace <your_bot_token> with the token you got from @BotFather above) to get the group id.
You can get the group id from the json response. The group id is something like “-1001234567890” (the key of group id is “id” under “chat”). Save the group id somewhere, we will need it later.
Prepare to code
There are two ways to program the Pico: C/C++ and MicroPython. I chose to use MicroPython here for faster development. MicroPython is a subset of the Python that has been pared down to run efficiently on microcontrollers. CircuitPython is also a good choice to program the Pico, it is a fork of MicroPython with more libraries and features.
To use MicroPython, we need to install the Thonny IDE and the MicroPython firmware on the Pico W. You can follow the official guide to learn how to work with Pico. We won’t go into details here.
Functions
There are some main functions in the program:
-
connect_to_wifi(): let the Pico W connect to the Wi-Fi network -
message_to_telegram(): check if the push button is pressed, if yes, send a message to the Telegram bot via http post request. -
request_to_play_wav(): a webserver is set up on the Pico W to receive the webhook request from Telegram bot. When the Pico W receives the trigger from webhook, it will trigger the speaker to play different sound according to the message received. -
play_wav(): play sound (.wav file) on the speaker using PWM mode
message_to_telegram() and request_to_play_wav() are running in different event loop. We need to use two threads to run them at the same time. uasyncio library is used to create the two event loops. There will be async in front when we define the two functions.
One more important thing, I want to explain why I don’t use CircuitPython here. Currently, CircuitPython on Pico doesn’t well support uasyncio or asyncio library , which is very useful to handle multiple tasks at the same time. So I choose to use MicroPython here.
Code
Overrall structure and imports
from machine import Pin, Timer, PWM
import uasyncio as asyncio
import urequests as requests
import uio
import ujson
import time
import network
import socket

# onboard led
led = Pin("LED", Pin.OUT)
tim = Timer()
counter_blink = 0

# push button, internal pull-up to 1
button_pin = Pin(15, Pin.IN, Pin.PULL_UP) # button is connected to pin 15 & GND

# simple spearker with + and - pins
speaker_pin = Pin(16, Pin.OUT) # speaker is connected to pin 16 & GND
pwm = PWM(speaker_pin)
pwm.freq(8000) # 8KHz sample rate

ssid = 'your_wifi_ssid' # wifi ssid
password = 'your_wifi_password' # wifi password
wlan = network.WLAN(network.STA_IF)

# blink led to indicate wifi connection done
def tick(timer):
    global led
    led.toggle() # toggle led state
    global counter_blink
    counter_blink += 1
    # blink 4 times
    if counter_blink >= 8:
        counter_blink = 0
        tim.deinit() # stop timer
        led.off() # turn off led

def connect_to_wifi():
    pass

async def play_wav(wav_file):
    pass

async def request_to_play_wav(reader, writer):
    pass

async def message_to_telegram():
    pass

async def main():
    print('Connecting to Network...')
    connect_to_wifi()
    # start webserver at port 5555 to receive TG webhook
    asyncio.create_task(asyncio.start_server(request_to_play_wav, "0.0.0.0", 5555))
    # start event loop to check if button is pressed and send message to TG
    asyncio.create_task(message_to_telegram())

    while True:
        print("heartbeat")
        await asyncio.sleep(6)

try:
    asyncio.run(main())
finally:
    asyncio.new_event_loop()
As you see from the imports, there are some u-libs (ujson, urequests, uasyncio, uio) used in the code, they are micro versions of the standard Python libraries. We have no need to install them, they are already included in the MicroPython firmware.
Connect to Wi-Fi
def connect_to_wifi():
    wlan.active(True)
    # quit power-saving mode to improve response speed
    wlan.config(pm = 0xa11140)
    wlan.connect(ssid, password)

    max_wait = 10
    while max_wait > 0:
        if wlan.status() < 0 or wlan.status() >= 3:
            break
        max_wait -=1
        print('waiting for wifi connection...')
        time.sleep(1)

    if wlan.status() != 3:
        raise RuntimeError('wifi connection failed.')
    else:
        print('wifi connected.')
        status = wlan.ifconfig()
        print('ip = ' + status[0])
        # start timer to blink led to indicate wifi connection is successful
        tim.init(freq=1, mode=Timer.PERIODIC, callback=tick)
Play .wav sound
async def play_wav(wav_file):
    # open and read the wav file
    # .wav requirement: 8Khz, 16-bit depth, mono channel
    with uio.open(wav_file, "rb") as f:
        # skip the .wav header (44 bytes)
        f.read(44)
        print("start playing wav...")
        while True:
            sample = f.read(2) # read 2 bytes (16bits), because 16-bit depth
            if len(sample) < 2:
                # end of file
                break
            # convert the 2 bytes into a 16-bit integer, little endian
            value = int.from_bytes(sample, 'little')
            pwm.duty_u16(value) # write the PWM value
            time.sleep_us(125) # dealy to match the sample rate (8KHz), 1/8000 = 125us
            # You can also try the following code, may sound better
            '''
            # alternative way to read 8-bit depth wav file
            sample_byte = f.read(1) read a single byte (8 bit depth, mono)

            if len(sample_byte) == 0:
                break

            # convert to 16 bit PWM value
            sample = int.from_bytes(sample_byte, "little") << 8
            pwm.duty_u16(sample)
Be careful with the .wav file format, I use .wav audio file with 8Khz, 16-bit depth, mono channel. You can use Audacity to convert your audio file to the correct format. Currently I didn’t find a good way to play .mp3 file on the Pico W if MicroPython is used. But you can use audiomp3 library to decode .mp3 file if you choose CircuitPython as the firmware.
Why do I use 8Khz, 16-bit depth, mono channel? Because the speaker I use is a simple speaker with only two pins, it doesn’t have DAC and amplifier built-in. Pico hardware is also not powerful enough.
The sound quality is bad, but it can work. I plan to use a better speaker with audio amplifier in the future. This model is good: Adafruit Mono 2.5W Class D Audio Amplifier.
Send message to Telegram
async def message_to_telegram():
    while True:
        if button_pin.value() == 0:
            print("Button is pressed.")
            try:
                headers = {'Content-Type': "application/json"}
                # replace <your_chat_id> with your group id
                data = {'chat_id': '-<your_chat_id>', 'text': 'Doorbell is pressed!'}
                json_data = ujson.dumps(data)
                # replace <your_bot_token> with your bot token
                res = requests.post(url='https://api.telegram.org/bot<your_bot_token>/sendMessage', headers=headers, data=json_data)
                if res.status_code == 200:
                    print("Message sent.")
            except Exception as e:
                print("Error while sending request:", e)
            await asyncio.sleep(4) # sleep 4s to avoid multiple presses in a short time

        await asyncio.sleep_ms(100) # sleep 100ms and check again
Sending message to Telegram is easy, we just need to send a http post request to the Telegram bot. The bot will then forward the message to the group chat. For details on sendMessage API, please refer to Telegram Bot API.
Set up webserver to receive webhook
Start webserver
In the main function, asyncio.start_server() is used to set up the webserver:
asyncio.create_task(asyncio.start_server(request_to_play_wav, "0.0.0.0", 5555))
Telegram webhook is a way for Telegram to send a http post request (with message) to our webserver when the bot receives the new group message. It means that our webserver needs to be accessible from the internet.
Expose pico to the internet
There are a few ways to expose our pico webserver to the internet:
-
If your home network have a public IP address, you can set up port forwarding on your router to achieve this. But it’s not safe to expose your Pico W or home IP to the internet directly.
-
I chose to use Cloudflare Tunnel (free $) to expose the Pico W to the internet. Cloudflare Tunnel can expose your local webserver to the internet with a secure tunnel. For the detail usage of Tunnel, you can refer to Cloudflare Tunnel document. There are two requirements if you choose this option: 1. You need to have a domain name. 2. You need have a machine (e.g. Raspberry Pi, pc) at home running Cloudflare Tunnel client.
The URL of my Pico W webserver is something like https://picow.my-domain.com/, the specific path to handle the webhook is /reply/. So the full URL to handle the webhook is https://picow.my-domain.com/reply/.
Set webhook
Before we use the webhook, we need to set the webhook URL for our Telegram bot. Just open your browser and go to https://api.telegram.org/bot<your_bot_token>/setWebhook?url=<your_webhook_url>. Replace <your_bot_token> with your bot token and <your_webhook_url> with your webhook URL. For details on Telegram webhook, please refer to Telegram Bot API.
Receive webhook
When the bot receives a new message from the group, it will send a http post request to our webserver.
Here is the request_to_play_wav() function:
async def request_to_play_wav(reader, writer):
    print("received http request.")

    headers = {}
    content_length = 0

    request_line = await reader.readline()
    method, path, _ = request_line.decode().split()

    # read and parse HTTP headers
    while True:
        line = await reader.readline()
        if line == b"\r\n":
            break
        header_name, header_value = [item.strip() for item in line.decode().split(":", 1)]
        headers[header_name.lower()] = header_value
        if header_name.lower() == 'content-length':
            content_length = int(header_value)

    response_code = '200 OK'
    response_content = ""

    if method == "POST" and path == "/reply/":
        body = await reader.read(content_length)
        # print("Body content:", body.decode())
        try:
            json_data = ujson.loads(body.decode())
            reply = json_data['message']['text']
            print(reply)
            if reply == '1':
                print("I'm at home, coming soon...")
                response_content = "I'm at home, coming soon..."
                await play_wav("at_home.wav")
            elif reply == '0':
                print("I'm not at home.")
                response_content = "I'm not at home, please contact me by phone."
                await play_wav("not_at_home.wav")
            else:
                print("unknown reply.")
                response_content = ("unknown reply.")
        except Exception as e:
            print("Error while parsing JSON:", e)
    else:
        print("Invalid request.")
        response_content = "Invalid request."
        response_code = '400 Bad Request'

    response = response_content
    writer.write(f'HTTP/1.0 {response_code}\r\nContent-type: text/html\r\n\r\n')
    writer.write(response)
    await writer.drain()
    await writer.wait_closed()
Here is the body of a sample http post request from Telegram bot, it should help you understand the code above:
{
   "update_id":611562902,
   "message":{
      "message_id":702,
      "from":{
         "id":896227844,
         "is_bot":false,
         "first_name":"my_name",
         "username":"my_username",
         "language_code":"en"
      },
      "chat":{
         "id":-823888928,
         "title":"Doorbell",
         "type":"group",
         "all_members_are_administrators":true
      },
      "date":1692525610,
      "text":"1"
    }
}
The request_to_play_wav() function will be called when the Pico W receives a http post request from the Telegram bot. It’s only interested in the post request with path /reply/. The program need to response to the Telegram bot with a http response with 200 OK, otherwise the bot will keep sending the same message to the webserver.
Done
The silent doorbell is done! I can now receive instant (~3s delay) notifications on both my iPhone and watch. Although I don’t always carry my phone with me, I do wear my watch all the time, making this quite convenient for me. The only downside is the poor sound quality of the current speaker, which I plan to replace with a better solution in the future.