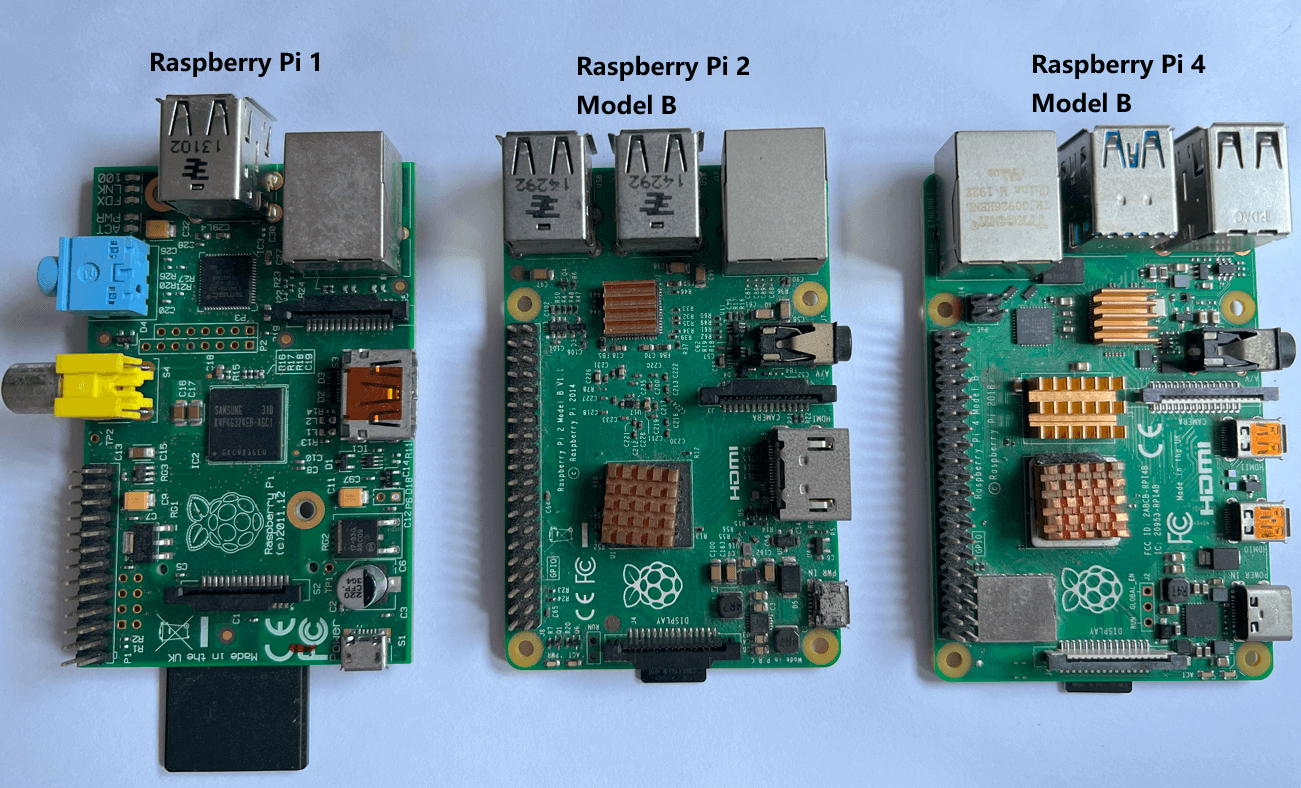
Three months ago, Raspberry Pi released its fourth generation Pi 4, and seeing the significant hardware improvements, I immediately placed an order. I just got my hands on it a couple of days ago. It really impressed me with its performance, and I’m very happy with it.
Counting from the time I acquired my first-generation Raspberry Pi 1 (which still works perfectly now!), I’ve purchased several over the years. This marks my 8th year using Raspberry Pi (since 2012), and correspondingly, my 8th year engaging with Linux; you could say it was my initiation into this realm.
I thought it would be useful to jot down some commonly used settings guide (from my personal experience) as a form of note-taking. I sometimes forget specific commands and details and need to look them up again, so having these notes can be a time-saver. The notes that follow are not arranged in any logical order; I’ve simply written down things as they came to mind.
Disable Leds
I don’t like the blinking lights (onboard and Ethernet LEDs) on the Raspberry Pi, so I always disable them. To do this, edit the /boot/firmware/config.txt file and add the following lines:
For Raspberry Pi 4:
# Turn off Power LED
dtparam=pwr_led_trigger=default-on
dtparam=pwr_led_activelow=off

# Turn off Activity LED
dtparam=act_led_trigger=none
dtparam=act_led_activelow=off

# Turn off Ethernet ACT LED
dtparam=eth_led0=4
# Turn off Ethernet LNK LED
dtparam=eth_led1=4
For Raspberry Pi 3:
# Turn off Power LED
dtparam=pwr_led_trigger=default-on
dtparam=pwr_led_activelow=off

# Turn off Activity LED
dtparam=act_led_trigger=none
dtparam=act_led_activelow=off

# Turn off Ethernet ACT LED
dtparam=eth_led0=14
# Turn off Ethernet LNK LED
dtparam=eth_led1=14
Blue Screen Fix on Remote Desktop using XRDP
I prefer to use the XRDP protocol to connect to the Raspberry Pi desktop remotely. For the security or os problems, you may encounter the blue screen when you try to connect to the Raspberry Pi desktop remotely.
To use XRDP, you need to install it first:
$ sudo apt install xrdp
To avoid the blue screen, there are two methods to fix it:
- Method 1:
$ sudo adduser xrdp ssl-cert
Then edit file /etc/X11/xrdp/xorg.conf. In the Section "Device", change the line Option "DRMDevice" "/dev/dri/renderD128" to Option "DRMDevice" "". Then restart the xrdp service:
$ sudo service xrdp restart
- Method 2:
For the security or whatever reason, root user pi is not allowed to connect to the desktop remotely. But you can create a new user and use it to connect to the desktop remotely.
$ sudo adduser <new-user-name>
Create a new user by following the prompts, then you can use this new user to connect to the desktop remotely.
But if you want to use the root user pi to connect to the desktop remotely, you can try method 1.
Setup Motion for Surveillance
I use the Raspberry Pi as a surveillance system, and I use the Motion software to achieve this. Motion is a highly configurable program that monitors video signals from many types of cameras. It is a command-line-based program.
To install Motion:
$ sudo apt install motion
Then edit the configuration file /etc/motion/motion.conf to configure the Motion. The configuration file is well documented, you can refer to it for details. Here I list some important configurations:
daemon on: run Motion as a daemonvideodevice /dev/video0: For most cases(usb camera), the default value is oknetcam_url rtsp://username:[email protected]:7777/: if we use RTSP as the video sourcemax_movie_time 0: set the maximum movie time, 0 means no limittext_right %Y-%m-%d\n%T: set the text on the video, this is time and datetext_scale 2: set the text scale 2target_dir /mnt/surveillance: set the surveillance video save foldermovie_filename /%Y-%m%d/%H%M-%S: set the surveillance video file name, will create a folder named by date, and the video file name is the timestream_port 8081: set the stream portstream_localhost off: allow remote access to the streamstream_maxrate 30: set the maximum frame rate of the streamstream_quality 90: set the quality of the streamstream_auth_method 1: set the stream authentication method, 1 means basic authenticationstream_authentication admin:password: set the stream authentication username and password
Clean the surveillance video folder can be done by a cron job:
$ sudo crontab -e # edit the cron job for root user

# clean surveillance video folder every day at 19:01
01 19 * * * rm -rf /mnt/surveillance/*

# if you want to start and stop the motion by cron job
# stop motion at 07:45 every day
45 07 * * * sudo killall -9 motion
# start motion at 19:15 every day
15 19 * * * sudo motion
If you want to make it auto start when the Raspberry Pi boot, you can add sudo motion to /etc/rc.local.
Sync Folder to Home NAS using Samba
One of my Pis is used as surveillance system, and I want to sync the surveillance video folder to my home NAS. I use Samba to achieve this.
Requirements:
- Pi ip:
192.168.1.10 - NAS surveillance video folder address:
//192.168.1.5/surveillance, username:admin, password:123456
First, install Samba Client:
$ sudo apt install smbclient cifs-utils
Then, create a folder to mount the NAS surveillance video folder, the surveillance system will save the video to this folder.
$ sudo mkdir /mnt/surveillance
Then, mount the NAS surveillance video folder to the folder we just created:
$ sudo mount -t cifs -o username=admin,password=123456,vers=2.0,iocharset=utf8,noserverino //192.168.1.5/surveillance /mnt/surveillance
vers=2.0: use SMB 2.0 protocol, change according to your NAS SMB protocol versioniocharset=utf8: use utf8 encoding, change according to your NAS encodingnoserverino: disable inode number from the server. Why do I need this? Because errorcannot access '/mnt/surveillance': Stale file handle, you can refer this link for details.
You can test the samba connection with the above command. If success, then you unmount the folder by:
$ sudo umount /mnt/surveillance
The above mount command is temporary, if you want to mount the folder permanently, you can add the following line to /etc/fstab:
//192.168.1.5/surveillance /mnt/surveillance cifs username=admin,password=123456,iocharset=utf8,vers=2.0,noserverino 0 0
Then run sudo mount -a to mount the folder.
Setup ownCloud as Personal Cloud Storage
I tried different self-hosted cloud storage solutions, including NextCloud, ownCloud, KodBox, Seafile, Cloudreve, etc. I found ownCloud is the most stable and easy to use. I installed ownCloud on my Raspberry Pi 4 using Docker Compose.
Here is my docker-compose.yml file:
version: "3"

volumes:
  files:
    driver: local
  mysql:
    driver: local
  redis:
    driver: local

services:
  owncloud:
    image: owncloud/server:${OWNCLOUD_VERSION}
    container_name: owncloud_server
    restart: always
    ports:
      - ${HTTP_PORT}:8080
    depends_on:
      - mariadb
      - redis
    environment:
      - OWNCLOUD_DOMAIN=${OWNCLOUD_DOMAIN}
      - OWNCLOUD_TRUSTED_DOMAINS=${OWNCLOUD_TRUSTED_DOMAINS}
      - OWNCLOUD_DB_TYPE=mysql
      - OWNCLOUD_DB_NAME=owncloud
      - OWNCLOUD_DB_USERNAME=owncloud
      - OWNCLOUD_DB_PASSWORD=owncloud
      - OWNCLOUD_DB_HOST=mariadb
      - OWNCLOUD_ADMIN_USERNAME=${ADMIN_USERNAME}
      - OWNCLOUD_ADMIN_PASSWORD=${ADMIN_PASSWORD}
      - OWNCLOUD_MYSQL_UTF8MB4=true
      - OWNCLOUD_REDIS_ENABLED=true
      - OWNCLOUD_REDIS_HOST=redis
    healthcheck:
      test: ["CMD", "/usr/bin/healthcheck"]
      interval: 30s
      timeout: 10s
      retries: 5
    volumes:
      - files:/mnt/data

  mariadb:
    image: mariadb:10.11 # minimum required ownCloud version is 10.9
    container_name: owncloud_mariadb
    restart: always
    environment:
      - MYSQL_ROOT_PASSWORD=owncloud
      - MYSQL_USER=owncloud
      - MYSQL_PASSWORD=owncloud
      - MYSQL_DATABASE=owncloud
      - MARIADB_AUTO_UPGRADE=1
    command: ["--max-allowed-packet=128M", "--innodb-log-file-size=64M"]
    healthcheck:
      test: ["CMD", "mysqladmin", "ping", "-u", "root", "--password=owncloud"]
      interval: 10s
      timeout: 5s
      retries: 5
    volumes:
      - mysql:/var/lib/mysql

  redis:
    image: redis:6
    container_name: owncloud_redis
    restart: always
    command: ["--databases", "1"]
    healthcheck:
      test: ["CMD", "redis-cli", "ping"]
      interval: 10s
      timeout: 5s
      retries: 5
    volumes:
      - redis:/data
Here is my .env file:
OWNCLOUD_VERSION=latest
OWNCLOUD_DOMAIN=localhost:8080
OWNCLOUD_TRUSTED_DOMAINS=localhost,192.168.1.226,my-domain.com
ADMIN_USERNAME=your-username
ADMIN_PASSWORD=your-password
HTTP_PORT=8080
OWNCLOUD_TRUSTED_DOMAINS is important, you need to add the domain or ip address (your ownCloud’s) here, otherwise, you can not access the ownCloud correctly.
Put docker-compose.yml and .env in the same folder, then run:
$ docker compose up -d
You can link your home NAS to ownCloud by adding external storage in ownCloud admin panel. ownCloud also provides nice desktop and mobile apps.
Disable Wifi on Ubuntu Server
To disable Wifi on Pi or Ubuntu Server, Rfkill is a good choice.
First, install Rfkill:
$ sudo apt install rfkill
Then, list all the devices:
$ rfkill list
You will see something like this:
0: hci0: Bluetooth
  Soft blocked: no
  Hard blocked: no
1: phy0: Wireless LAN
  Soft blocked: no
  Hard blocked: no
In above example, hci0 is Bluetooth, phy0 is Wifi. To disable WiFi, run:
# sudo rfkill block <device-id>
$ sudo rfkill block 1
The WiFi is disabled immediately, and won’t be enabled after reboot. You can enable it by:
$ sudo rfkill unblock 1
$ sudo reboot
Enable Autologin in Ubuntu Server 22
-
Open the
/etc/systemd/logind.conf, uncomment the line that start with#NAutoVTs=, and change the value to6:NAutoVTs=6would auto-login the first 6 TTYs. -
Uncomment the line that starts with
#ReserveVT=, if you want to auto-login TTYs 1-6, you would putReserveVT=7to start reserving from the 7th TTY.
Note: The two directives “NAutoVTs” and “ReserveVT” are configurations related to the systemd-logind service, which handles user logins in a Linux system and are typically found in the logind.conf file.
NAutoVTs: This directive sets the number of virtual terminals (VTs) to allocate by default that systemd-logind will manage.ReserveVT: This directive sets the number of the first virtual terminal that shall unconditionally be reserved for a getty. Essentially, these directives control how many virtual terminals are allocated and managed bysystemd-logindand which ones are reserved for certain types of usage.
- Next, create a service to auto-login your user. To do so, create a directory named
[email protected]under/etc/systemd/system/location.
$ sudo mkdir /etc/systemd/system/[email protected]/
Repeat the above for all the six TTYs by replacing tty1 with tty2, tty3, tty4, tty5, and tty6.
then create a service file named override.conf under each of the above directories. (also repeat 6s times)
$ sudo nano /etc/systemd/system/[email protected]/override.conf

# add the following lines to the file, replace your-user-name with your username
[Service]
ExecStart=
ExecStart=-/sbin/agetty --noissue --autologin your-user-name %I $TERM
Type=idle
Finally, reboot the system to apply the changes.
Remote SSH over Cloudflare Tunnel
- SSH server need to enabled.
For Raspberry Pi OS, run sudo raspi-config to enable SSH server. (Interface Options -> SSH -> Enable).
For Ubuntu server:
$ sudo apt install openssh-server
$ sudo systemctl enable ssh
$ sudo ufw allow ssh
-
Install Cloudflare Tunnel (
cloudflared) in machine (CF Zero Trust Dashboard -> Network -> Tunnels -> Create a tunnel) -
Create a ssh tunnel (
ssh://localhost:22) in Cloudflare Zero Trust dashboard (Network -> Tunnels -> your-tunnel -> Public Hostname -> Add a public hostname), a domain or subdomain name is required. -
Create an Cloudflare Access application (Access -> Applications), and add the ssh tunnel URL (
https://ssh.example.com) to the application, set the policy. In settings option, Enable automatic cloudflared authentication and selectSSH Browser renderingin additional settings. -
Access the ssh in any browser by the domain name you set in step 3 and 4, for example:
https://ssh.example.com. This page will redirect to the Cloudflare Access login page, after login, the ssh terminal will be shown.
Wake-on-LAN for Ubuntu Server
-
Turn on WoL function in BIOS setting (Ethernet cable connection is required.)
-
Check whether WoL is turned on in Ubuntu server:
$ sudo apt install ethtool
# use ethtool to check WoL is turned on for the network adapter
# replace 'eth0' with your adapter name
$ sudo ethtool eth0 | grep Wake-on
If the output contains Wake-on: g, it means that WoL function is activated in OS.
- If WoL is not activated in OS, then activate it manually.
$ sudo ethtool -s eth0 wol g
To keep it work permanently, the above command should be executed automatically in every reboot.
Here we create a systemd service to do this:
$sudo nano /etc/systemd/system/wol.service
Add the following lines, remember to replace eth0 with your adapter name:
[Unit]
Description=Configure Wake On LAN

[Service]
Type=oneshot
ExecStart=/sbin/ethtool -s eth0 wol g

[Install]
WantedBy=multi-user.target
Then start the service:
$ sudo systemctl enable wol.service
$ sudo systemctl start wol.service
- Shutdown the system and try to WoL.
Notes: WoL can work after sudo shutdown now or sudo poweroff, not for sudo halt.
If we want to send magic packet to the target machine to wake it up, we can use wakeonlan command:
# replace '00:11:22:33:44:55' with the MAC address of the target machine
$ sudo wakeonlan 00:11:22:33:44:55