Why did I made this?
Recently, a friend of mine working in finance asked for a favor: a little tool to solve some work hassles and save her time. She’s swamped with tons of Excel sheets daily, filled with endless entries. Often, there are just minor updates, making row-by-row comparisons a true nightmare. So, she begged for a quick Excel comparison tool. (Yeah, there are paid tools out there, but she’s a bit … thrifty. 😂)
Overview of the app
To quickly craft this tool, I turned to Python, knowing that the pandas library excels at managing Excel data. I hadn’t made GUI applications with Python before. But given my comfy rapport with C/C++’s Qt, I opted for PyQt (Qt’s Python binding). Its logic and most functions are same as pure Qt, so learning it was a cinch. The app’s blueprint is straightforward: PyQt for the GUI and pandas for Excel data. And, I’ve used the PyQt5 version here (Update 2021: the same code works for PyQt6 too!).
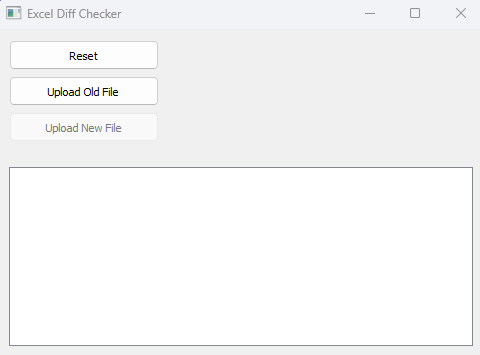
The app’s GUI is simple: two buttons to upload Excel files, a button to reset, and a table widget to display the Excel data. After second Excel file is uploaded, the table widget will display the second Excel table with differences highlighted. The differences are highlighted in red. The app also supports multiple sheets in one Excel file, and the sheet names are displayed in the combo button, which can be used to switch between sheets. There is also a label to display the number of differences found.

The app’s logic is also simple: load Excel files with pandas, compare them, and display the table with differences highlighted. We’ll go through the code step by step in the following sections.
Requirements and dependencies
The app is written in Python 3, it should work in Windows, Linux, and macOS.
Install the following packages with pip:
$ pip3 install pandas pyqt5
Update 2021:
if you want to use PyQt6, install it with:
$ pip3 install pyqt6
Build the GUI
There are two ways to build the Qt GUI in Python: import the UI file made by Qt Designer or coding it directly. I chose to code it directly, as this app GUI is simple.
The app is not complex, I plan to finish all jobs in one QWidget class. So, I inherited the QWidget class and added the widget in the constructor. All functions are defined in the class. The main code framework is as follows:
# main.py
import sys
# "if you use PyQt6, import it instead of PyQt5"
from PyQt5.QtCore import Qt
from PyQt5.QtWidgets import QApplication, QWidget, QFileDialog, QTableWidget, QTableWidgetItem
from PyQt5.QtWidgets import QButtonGroup, QPushButton, QHBoxLayout, QVBoxLayout, QLabel
from PyQt5.QtGui import QColor
import pandas as pd

class FilesCompare(QWidget):
    def __init__(self):
        super().__init__()

        # init some variables
        self.first_data = None # first Excel data
        self.second_data = None # second Excel data
        self.current_sheet = None # current sheet name
        self.current_button = None # current sheet button

        self.initUI()

    def initUI(self):
        ......

    ......
    other functions
    ......

def main():
    app = QApplication(sys.argv)
    fc = FilesCompare()
    fc.show()
    sys.exit(app.exec())

if __name__ == '__main__':
    main()
Because we code the UI directly, we need to define all UI elements and layout them in the constructor. Here are the code snippets:
def initUI(self):
    self.setWindowTitle("Excel Diff Checker")
    layout = QVBoxLayout() # main layout is vertical

    self.reset_button = QPushButton("Reset")
    self.reset_button.setFixedSize(150, 30)
    # connect to reset function, signal is reset_button.clicked
    self.reset_button.clicked.connect(self.reset)
    layout.addWidget(self.reset_button)

    self.first_button = QPushButton("Upload Old File")
    self.first_button.setFixedSize(150, 30)
    # connect to load_first_file function, signal is first_button.clicked
    self.first_button.clicked.connect(self.load_first_file)
    self.first_label = QLabel()
    first_layout = QHBoxLayout()
    first_layout.addWidget(self.first_button)
    first_layout.addWidget(self.first_label)
    layout.addLayout(first_layout)

    self.second_button = QPushButton("Upload New File")
    self.second_button.setFixedSize(150, 30)
    # connect to load_second_file function, signal is second_button.clicked
    self.second_button.clicked.connect(self.load_second_file)
    self.second_button.setEnabled(False)
    self.second_label = QLabel()
    second_layout = QHBoxLayout()
    second_layout.addWidget(self.second_button)
    second_layout.addWidget(self.second_label)
    layout.addLayout(second_layout)

    # sheet buttons
    self.button_group = QButtonGroup(self)
    # connect to sheet_changed function, signal is button_group.idClicked
    self.button_group.idClicked.connect(self.sheet_changed)
    self.sheet_buttons_layout = QHBoxLayout()
    self.sheet_buttons_layout.setAlignment(Qt.AlignmentFlag.AlignLeft)
    self.sheet_buttons_layout.setSpacing(10)
    layout.addLayout(self.sheet_buttons_layout)

    self.result_label = QLabel()
    self.result_label.setStyleSheet("color: blue")
    layout.addWidget(self.result_label)

    # here is the table widget to display Excel data
    self.table_widget = QTableWidget()
    self.table_widget.horizontalHeader().setStyleSheet(
        "QHeaderView::section { background-color: #F0F0F0 }"
    )
    self.table_widget.verticalHeader().setStyleSheet(
        "QHeaderView::section { background-color: #F0F0F0 }"
    )
    self.table_widget.setEditTriggers(QTableWidget.EditTrigger.NoEditTriggers)
    layout.addWidget(self.table_widget)

    self.setLayout(layout)

    self.resize(800, 600)
    self.center_on_screen() # center the window on screen

def center_on_screen(self):
    screen = QApplication.primaryScreen()
    screen_center = screen.availableGeometry().center()
    window_rect = self.frameGeometry()
    window_rect.moveCenter(screen_center)
    self.move(window_rect.topLeft())

def reset(self):
    self.first_data = None
    self.second_data = None
    self.first_label.clear()
    self.second_label.clear()
    self.current_sheet = None
    self.second_button.setEnabled(False)
    self.result_label.clear()
    self.table_widget.clear()
    self.table_widget.setRowCount(0)
    self.table_widget.setColumnCount(0)
    self.current_button = None

    # remove all sheet buttons
    while self.sheet_buttons_layout.count():
        button = self.sheet_buttons_layout.takeAt(0).widget()
        if button:
            self.button_group.removeButton(button)
            button.deleteLater()

    self.resize(800, 600)
    self.center_on_screen()
Qt uses signal and slot mechanism to handle events, so we need to connect the buttons’ clicked signal to the corresponding slots. slot is just a function, and we need to define the functions.
The reset_button is connected to the reset function, the first_button is connected to the load_first_file function, and the second_button is connected to the load_second_file function. The sheet_buttons are connected to the sheet_changed function. The sheet_changed function will be called when the sheet button is clicked, and it will change the current_sheet and update the table widget. The reset function will reset all variables and clear the table widget. The load_first_file function will load the first Excel file. The load_second_file function will load the second Excel file and display the second Excel with differences highlighted in the table widget.
Deal with Excel
Now let’s deal with Excel files. QFileDialog is used to open the file dialog to select Excel files. The pandas.read_excel function can load Excel files into pandas.DataFrame. We can use the pandas.DataFrame.ne (“ne” means “not equal”) function to compare two DataFrames, it will return a DataFrame with True and False values. True means the two DataFrames are not equal, False means the two DataFrames are equal.
Here is the code snippet:
def load_first_file(self):
    # open file dialog to select Excel file, xls and xlsx are supported
    file_name, _ = QFileDialog.getOpenFileName(self, "Upload First Excel File", "", "Excel Files (*.xls *.xlsx);")
    if file_name:
        self.first_data = pd.read_excel(file_name, sheet_name=None)
        self.second_button.setEnabled(True)
        self.reset_button.setEnabled(True)
        self.first_label.setText(file_name.split('/')[-1])
        self.first_label.setStyleSheet("color: blue")

def load_second_file(self):
    file_name, _ = QFileDialog.getOpenFileName(self, "Upload Second Excel File", "", "Excel Files (*.xls *.xlsx);")
    if file_name:
        self.second_label.setText(file_name.split('/')[-1])
        self.second_label.setStyleSheet("color: blue")
        self.second_data = pd.read_excel(file_name, sheet_name=None)
        # create sheet buttons according how many sheets in the Excel file
        for i, sheet in enumerate(self.first_data.keys()):
            button = QPushButton(sheet)
            button.setFixedSize(150, 25)
            self.button_group.addButton(button, i)
            self.sheet_buttons_layout.addWidget(button)
        self.resize(1500,960)
        self.center_on_screen()
        # set the first sheet as current sheet
        self.sheet_changed(0)

def sheet_changed(self, id):
    # if sheet button is switched, change the current sheet
    if self.current_button:
        self.current_button.setStyleSheet("")
    self.current_sheet = list(self.first_data.keys())[id]
    self.current_button = self.button_group.button(id)
    self.current_button.setStyleSheet("background-color: darkCyan")

    self.compare_and_display_data()

def compare_and_display_data(self):
    if self.first_data is not None and self.second_data is not None:
        first_df = self.first_data[self.current_sheet]
        second_df = self.second_data[self.current_sheet]
        # compare two DataFrames and get a DataFrame with True and False values
        change_mask = first_df.ne(second_df)
        # True means the two DataFrames are not equal, False means the two DataFrames are equal
        count_changes = change_mask.sum().sum() # count the number of changes

        self.result_label.setText(f"Total number of changes in sheet {self.current_sheet}: {count_changes}")

        # display the second DataFrame in the table widget
        self.table_widget.setRowCount(second_df.shape[0])
        self.table_widget.setColumnCount(second_df.shape[1])
        self.table_widget.setHorizontalHeaderLabels(second_df.columns.tolist())

        for i in range(second_df.shape[0]):
            for j in range(second_df.shape[1]):
                item = QTableWidgetItem(str(second_df.iat[i, j]))
                if change_mask.iat[i, j]:
                    # if the value is different, highlight it in red
                    item.setBackground(QColor(255, 0, 0))
                self.table_widget.setItem(i, j, item)
To be more clear, I will explain these two line of code:
change_mask = first_df.ne(second_df)
count_changes = change_mask.sum().sum()
first_df.ne(second_df) use the pandas.DataFrame.ne funcion, short for “not equal”, to compare each element in first_df against the corresponding element in second_df. It returns True for inequalities and False for matches.
change_mask is a new DataFrame with the same structure as the original DataFrame, but filled with boolean values indicating discrepancies.
Here is an example:
first_df:
       col_A  col_B
row_0   1.5    2.2
row_1   3.1    4.6

second_df:
       col_A  col_B
row_0   1.5    2.7
row_1   5.4    4.6

change_mask:
       col_A  col_B
row_0  False  True
row_1  True   False
change_mask.sum().sum() is to count the True values in change_mask, indicating differences. change_mask.sum() counts the True values column-wise. change_mask.sum().sum() then sums up these column counts to give a total difference count across the entire DataFrame. In this example, it’s 2, indicating two discrepancies between first_df and second_df.
Other code is easy to understand, I also added some comments in the code, which should be easy to follow.
Run the app and conclusion
Put all above functions into class FilesCompare, and run the app with python3 main.py. The app should work as expected. But I didn’t add any error handling here. For example, if the Excel file is not valid, the app will crash. You can add some error handling code to make the app more robust.
The code is quite simple, but it’s enough for my friend’s needs. I hope this article can help you too.